Your company has a problem. You need a creative solution. You know human-centered design can help you frame the problem and generate ideas to pursue. And you may even know who you want to collaborate with and when you’ll hold the work session.
Beyond that, you still have many questions:
- What is the goal of your work session? What outcomes do you want to achieve?
- Which activities and design methods will you use, and in what order?
- How much time will you need?
- What materials should you use?
- How can you collaborate remotely?
- How will you keep everyone energized and focused, so they actively participate, collaborate, and align on a path forward?
You realize you need a clear goal and a detailed plan with a step-by-step agenda so your session has a successful outcome and your team feels aligned on what to do next.
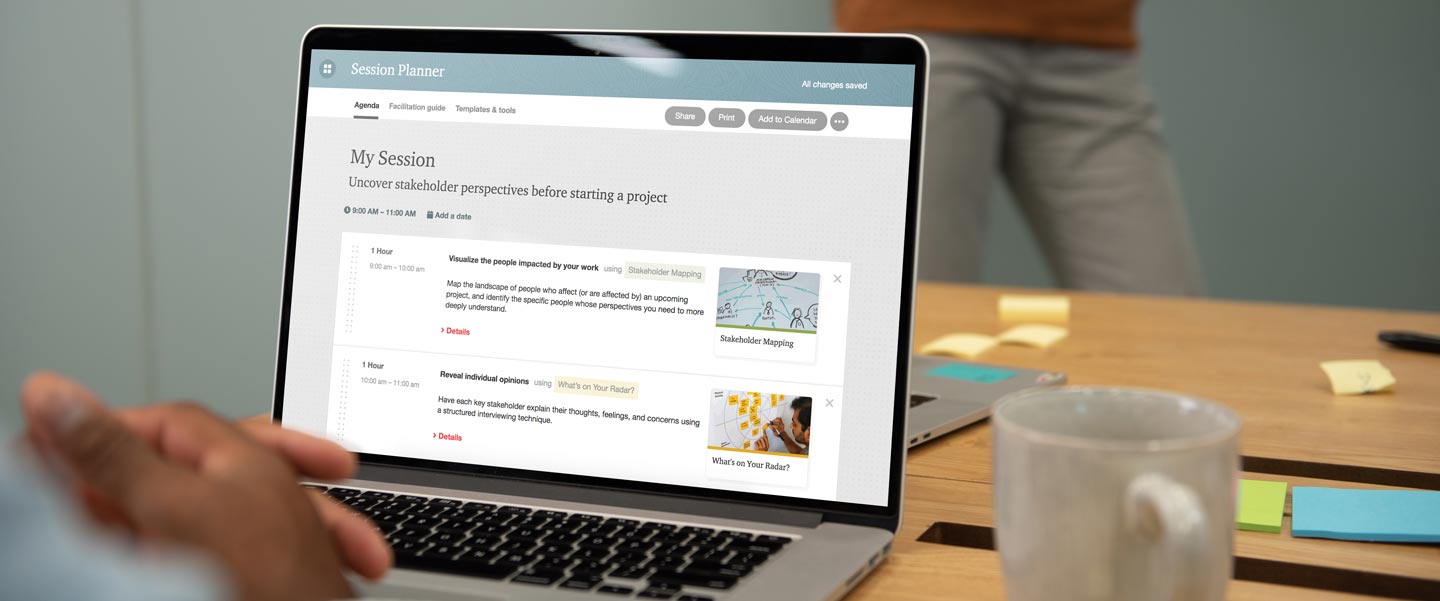
That’s where LUMA Workplace® comes in. Our digital platform has an interactive tool that can help you plan your human-centered design work session, down to the smallest details. Session Planner will guide you through designing, preparing for, and facilitating effective sessions that people love.
Like everything at LUMA, Session Planner is built on the LUMA System of Innovation: our unique framework of 36 human-centered design methods. You’ll draw from that set of methods to build your session.
If you’re new to Session Planner, read this article on the LUMA Help Center before you begin. If you’re new to LUMA Workplace, read this Help Center article.
If you prefer to learn by watching a video, check out this tutorial! Otherwise, read on for step-by-step instructions.
Step one: Define a clear goal to guide your work session
Before you begin building your work session, it’s important to define the goal or purpose. The goal acts as your guide as you build your session agenda for collaborating with others.
The first step when you begin a new session in Session Planner is to give your session a name and list the goal or purpose. You’ll want to reflect the outcomes you’re hoping to achieve.
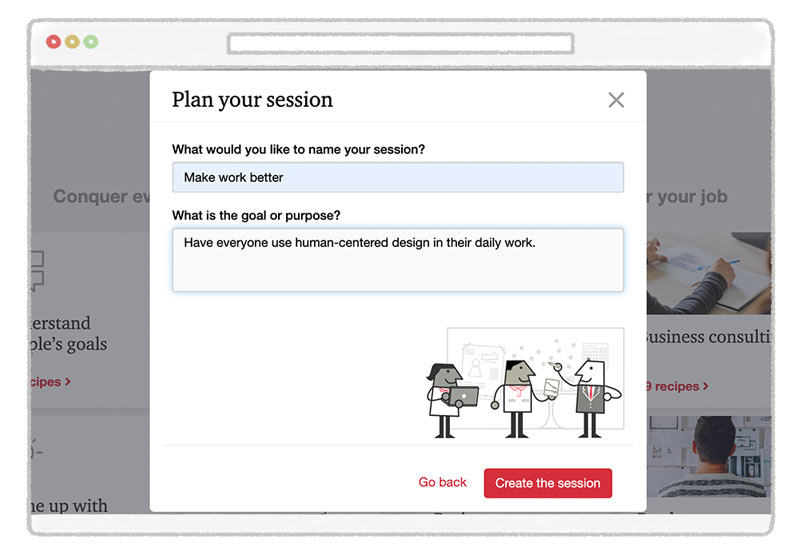
Before you start your session, write the name and goal at the top of the whiteboard (whether it’s physical or digital) and share it with your participants at the beginning of the session.
Throughout the session, refer back to the goal to keep participants focused. Before introducing a new method, take a step back and remind everyone what the group is working toward.
Step two: Choose the right human-centered design methods for your session
First, answer some basic questions to point you in the right direction.
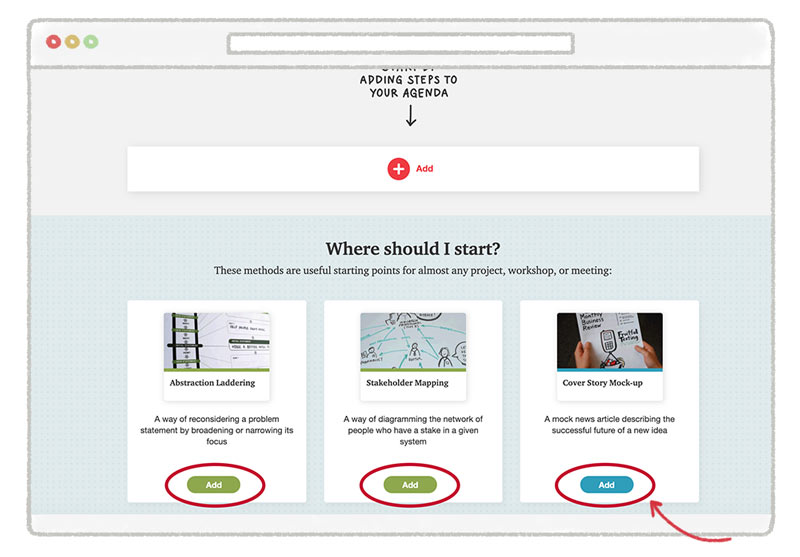
Each time you create a new agenda in Session Planner, you’ll see three methods that can serve as useful starting points for any challenge, depending on your circumstances.
- Abstraction Laddering will help you ensure that you’re focused on the right problem.
- Stakeholder Mapping will help you understand who has a stake in your problem landscape.
- Cover Story Mock-up will help you envision what success might look like.
Read a short description about each method. When you find the one that seems to fit your challenge, click the Add button to add it as the first method in your session agenda.
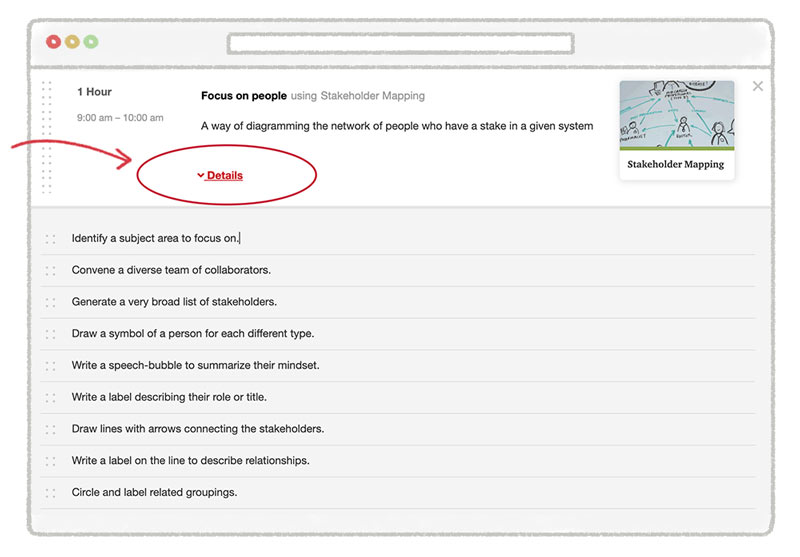
After adding a method, click Details to learn how to facilitate that method, start to finish. Session Planner lets you add notes or change the existing description to fit your situation.
Each time you add a method to your agenda, Session Planner will display three additional methods to consider using next based on the previous method you chose. The logic behind method suggestions is based on best practices from experts who use LUMA methods every day: our global team of instructors, coaches, and human-centered design experts.
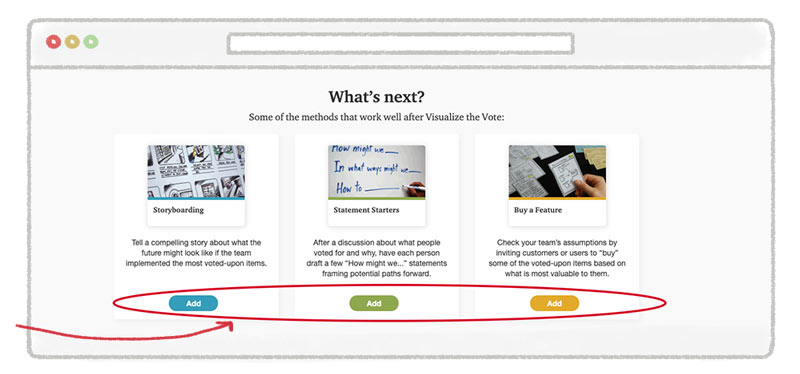
As you use Session Planner over time, these suggestions will help you learn about useful method combinations in a way that is directly relevant to your work.
Step three: Develop a detailed agenda with timepoints built right in
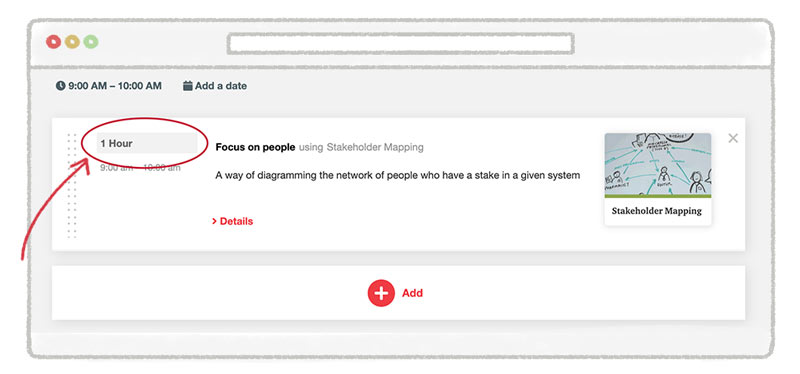
As you build your session, pay attention to the time allotted. Each method will automatically populate with the suggested amount of time, but Session Planner lets you change the duration, if you’d like.
Pro tip: If you’re running the session remotely, limit the session to no more than two methods and keep the session under two hours. This will help prevent virtual meeting fatigue for your teams!
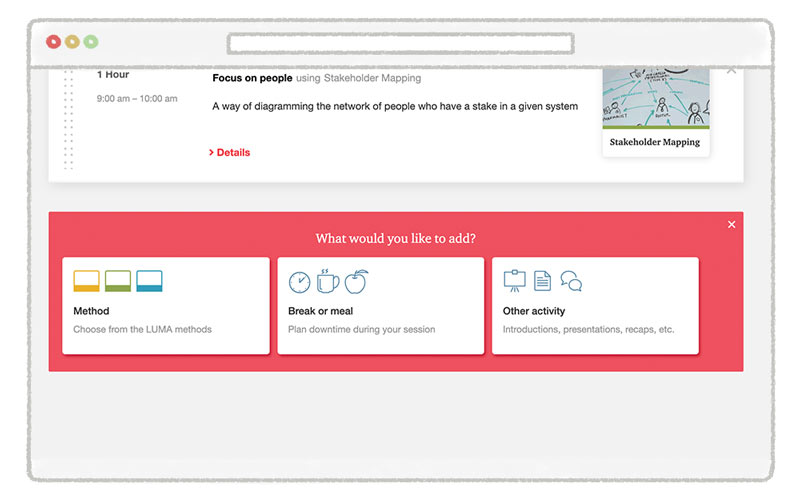
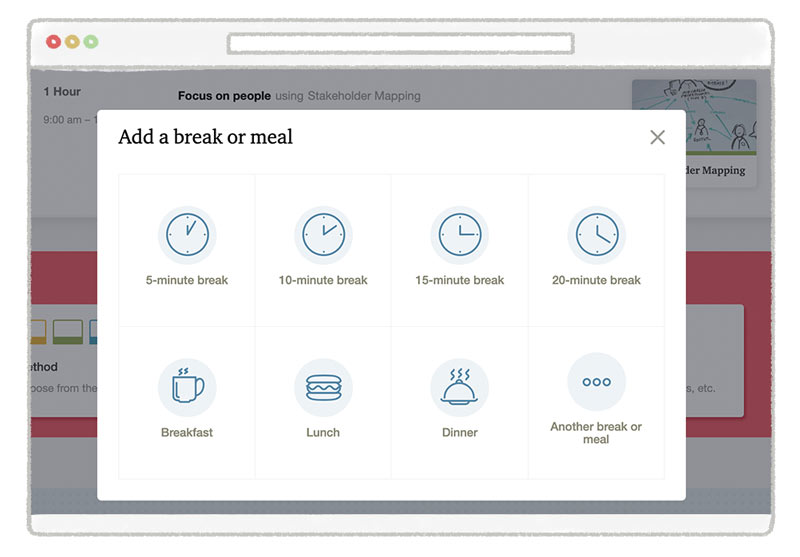
Session Planner lets you build breaks right into your agenda. For example, if the session is longer than one hour, include a five-to-10-minute break in the middle for coffee, water, and some time to stretch.
Agenda advice
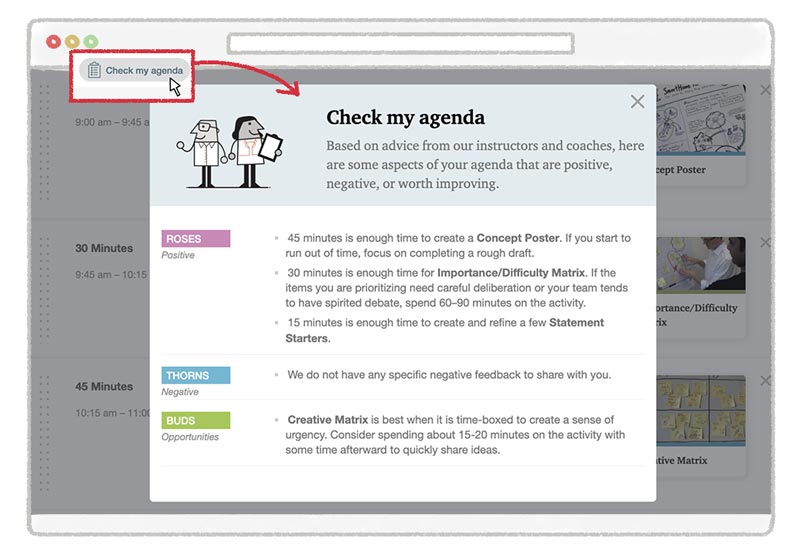
Once you’re satisfied you have the right methods, it’s always good to have a second pair of eyes on it. Another tool within Session Planner is ready to help!
Click the Check my agenda button at the top of a session agenda to read advice from our instructors and coaches, in the form of Roses, Thorns, and Buds (one of our 36 methods) about the structure of your agenda.
We’ll point out aspects of your agenda that could benefit from a second look. For example, if your agenda has too much — or too little — time planned for any given method, Session Planner will let you know.
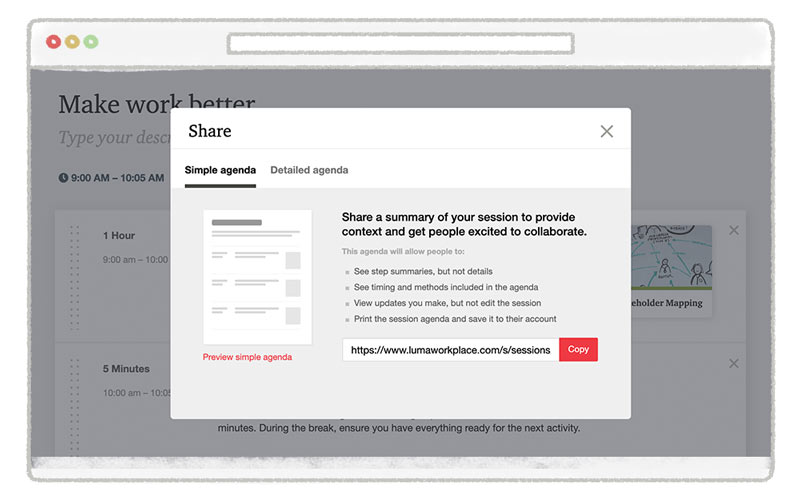
Step four: Share your agenda with participants in advance
After checking your agenda, you can share your plan with your collaborators so they have an idea what to expect.
Click the share icon at the top of the session agenda, then copy and share the link in whatever types of communication you’re sending, whether that’s email, instant messaging apps, or something else.
Step five: Gather the online resources or hard copy materials you’ll need
Next, make sure you have all of the online resources or hard copy materials you’ll need to run the session so you can gather those things well ahead of time.
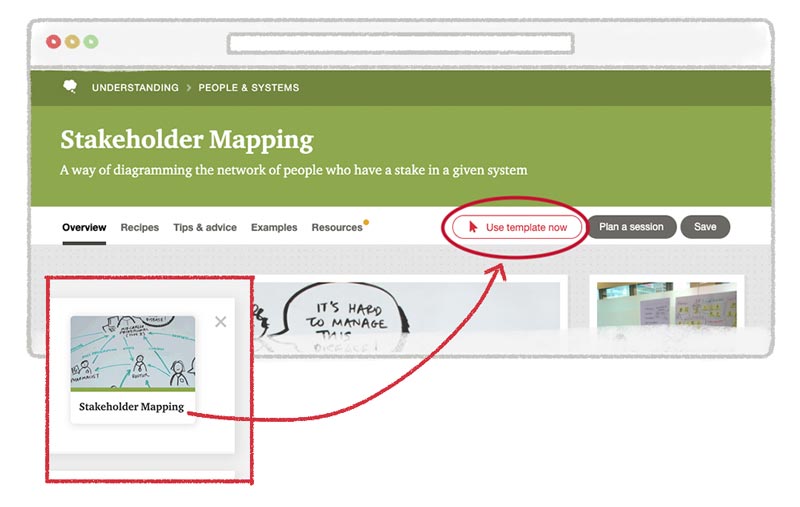
If you’re running the session virtually and you have access to Mural, you can open each method into a pre-built template for remote collaboration. Just click the method in your agenda, then click Use template now.
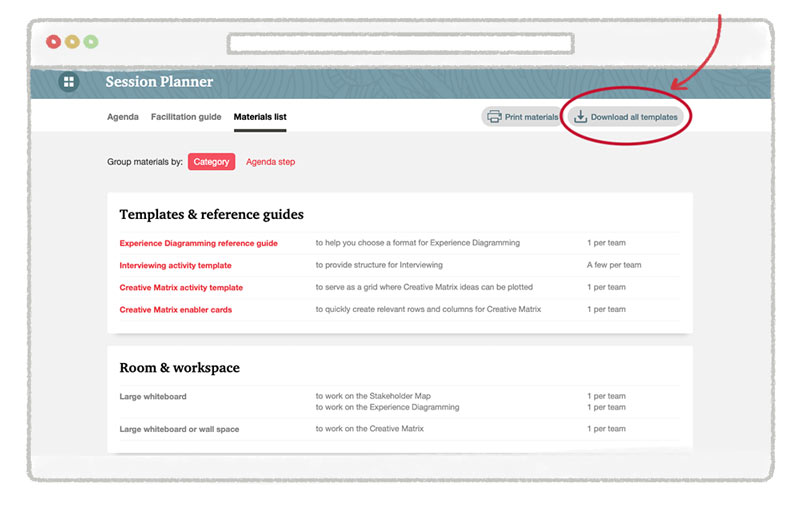
If you don’t have access to MURAL, or you’re conducting the session in person, click Materials list on the top navigation bar of your session agenda.
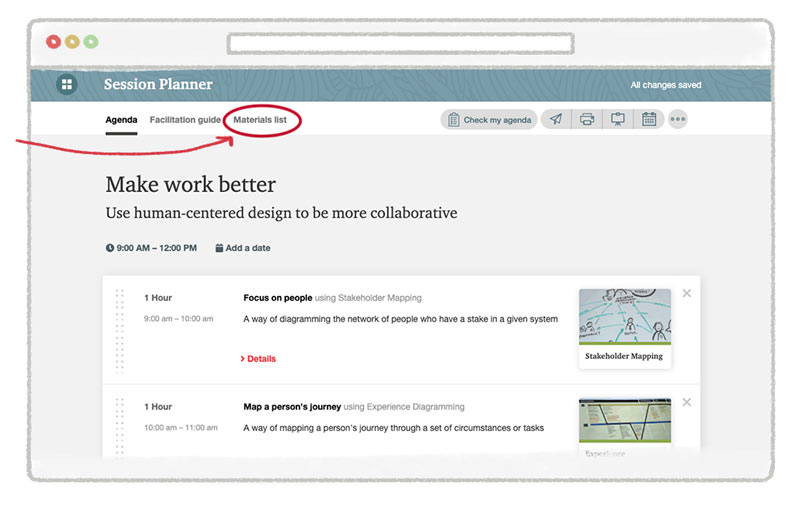
On this tab you’ll find a list of materials for the human-centered design methods you’ve chosen. You can print the list to have as you gather the items, and you can download any of the Activity Templates you’re planning to use.
If you’re conducting the session virtually, you can download the Activity Templates and upload them into a virtual whiteboard. If you don’t have access to a virtual whiteboard, Google Slides or Microsoft Powerpoint can serve as suitable alternatives.
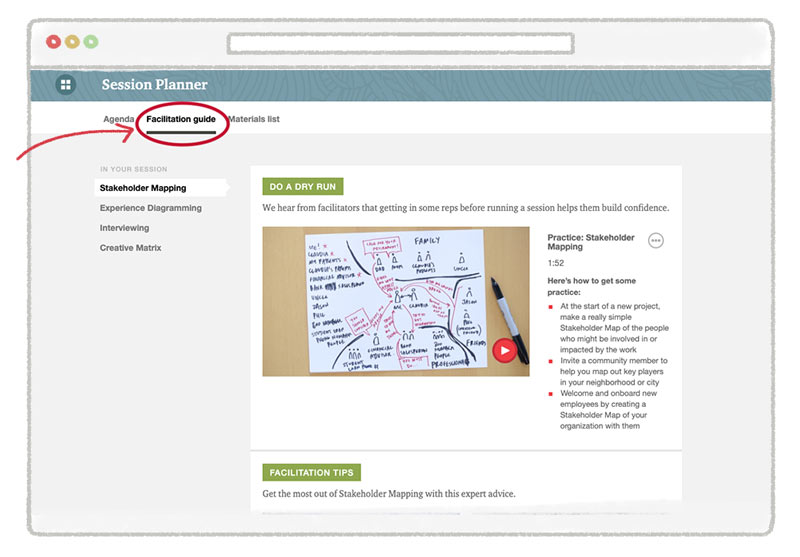
Step six: Use the Facilitation Guide to do a practice run
We highly recommend doing a practice run (or two) of your session. We hear from facilitators that walking through the methods and activities before running a session helps them build confidence and work out any issues in advance.
Our Facilitation Guide provides in-the-moment guidance for every step of the session you design. You’ll find it on the top navigation bar of your session agenda. Open it to view tips from LUMA’s expert instructors and coaches to help you successfully facilitate each method.
Step seven: Run your session!
Now you’re ready for a productive and effective human-centered design work session tackling your team’s problem.
Be sure to take photos or screenshots (with participants’ permission, of course!) and save all your artifacts as reference materials for the work that emerges from your session.
If you need additional help designing your session, start a conversation with us on LUMA Workplace; we’re happy to help!